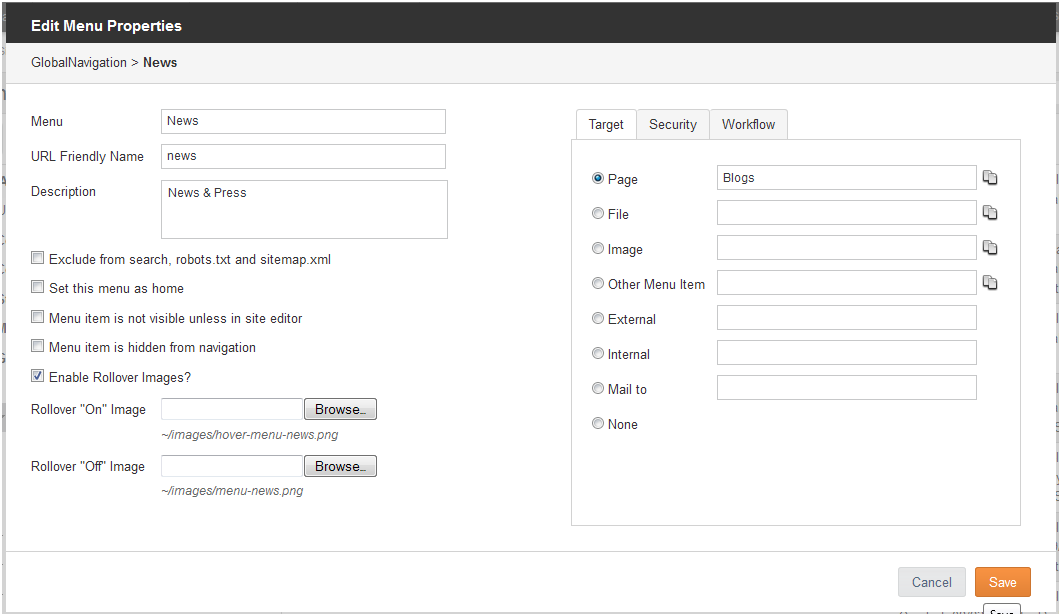
| URL Friendly Name |
A shorter "friendly" name to appear in the URL, if different than the Menu Name. This fills with menu name by default but can be changed if desired. |
| Description |
Description of the Menu Item, which can help with searches. |
| Exclude from search, robots.txt and sitemap.xml |
Checking this will hide the menu and its target. |
| Set this menu as home |
Checking this will make this node the default menu item and page for the site. All visits to the main domain name (www.company.com) will reach the page attached to this menu first. |
| Menu item is not displayed or accessible from the website. |
Checking this box means the menu item will be "invisible," that is, it will not appear to website users on the front end of your website, nor will they be able to type the URL in directly. You will still see the Menu Item while in Site Editor, so that it can be edited and made visible at some other time. |
| Menu item is not displayed but is accessible on the website. |
Checking this box will hide the Menu Item from website users and from the site map provider. However, if a user types in the URL or has a direct link, then the page attached to the menu item is still accessible without being logged into Site Editor. |
| Enable Rollover Images |
If you would like to include an image that will appear when a user's cursor rolls off and on the menu item, check this box. Then click Browse to search the library for the appropriate images. |
| Target Tab |
Chose the target that the menu will connect to. You can choose a page, file, image or even other menu items within iAPPS, an external URL or a email address.
- To direct the menu item to an iAPPS item, click the appropriate radio button and then the Pages icon to bring up a dialog box to choose your page, file or directory.
- To direct the menu item to an external URL or email address, enter the URL or address in the appropriate field.
- You can also choose none, but if you do so, you should make sure the menu is not visible on the front end, so that users are not trying to navigate with an empty menu item.
|
| Security Tab |
If you would like to set a Security Level for the Menu Item, then check one of the existing security levels. Any website users who are not tagged with the same Security Level will be unable to access content in the Menu Item's directory.
If you need to add additional levels, click on the Edit Security Levels button.
Alternatively, you can have the Menu Item
- Propagate Security Level to all sub-menu items: Click this checkbox to propagate all selected security levels to all sub-menu items.
- Inherit User/Group Permissions from parent menu item: Click this checkbox to assign user/group permissions to this menu item through inheritance of its parent menu item.
|
| Workflow Tab |
If a Workflow is assigned to the Menu item, the checkbox next to its name will be filled in. Otherwise, check the box next to the Workflow name to assign it to a new menu or to change the workflow.
Menu Item Check Box Options Description
- Propagate Workflow to all sub-menu items: Click this checkbox to propagate an assigned workflow to all sub-menu items.
- Inherit Workflow from parent menu item: Click this checkbox to assign a workflow to this menu item through inheritance of its parent menu item.
|