Open topic with navigation
Building Workflows Scenario
Workflows can range from the simple to the complex, depending on the needs of your organization. Below is an example that includes the traditional roles of Content Author Approver, and Publisher, but the same practices can be used to set up more complex workflows. However, you must have administrator privileges to set up any workflow.
In general with workflows, it’s best to create groups instead of assigning workflows to a single user. Then if a user is out of the office, the workflow will still continue with others in that group. Also, if someone leaves your organization, you don’t have to recreate the entire workflow, just add and delete users from a group as needed.
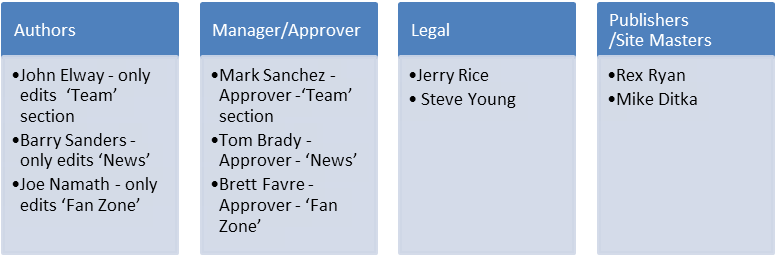
if for example, your company, the USA Nationals, wanted to create a workflow that limit authors/editors to only entering content in parts of the site. The content would then move to approvers, a legal department and onto a group of ‘Site Masters.’ Below are the users involved in this sample process and their roles.
Below are the steps in iAPPS to set up this workflow.
Setting up Users
If the users for this workflow already exist, a Content Administrator can add or edit permissions. Otherwise, a Site Administrator would need to create any additional users involved with this Workflow. See "Managing CMS Users"
In adding users or changing their roles, the Administrator should assign the following roles:
- Authors as ‘Author’ or Custom Permissions
- John Elway, Barry Sanders and Joe Namath
- Approvers as ‘Global Approver’
- Mark Sanchez, Tom Brady and Brett Favre
- Legal as ‘Global Approver’
- Jerry Rice and Steve Young
- Site Masters as ‘Content Administrators’
Creating User Groups
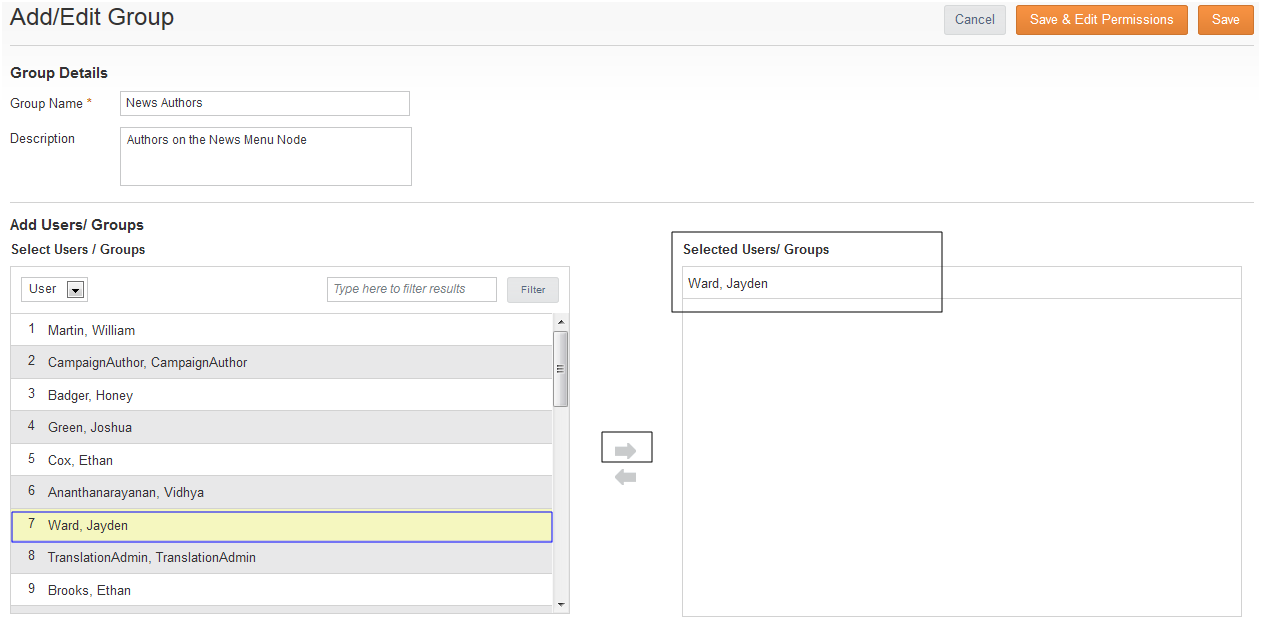
Next, create User Groups for each of these roles. See "Managing Content Manager (CMS) Groups"
- The groups listed below can contain one person or many people. It is a best practice in iAPPS to place Workflow users into Groups.
For this example we will add the users to a Group, including:
- ‘Team Authors’ – John Elway
- ‘News Authors’ – Jaydan Ward
- ‘Fan Zone Authors’ – Joe Namath
- ‘Team Approvers’ – Mark Sanchez
- ‘News Approvers’ – Tom Brady
- ‘Fan Zone Approvers’ – Brett Favre
- Legal – Jerry Rice and Steve Young
- Site Masters – Rex Ryan and Mike Ditka
Only a Site Administrator can create new CMS Groups, although Content Administrators can edit them afterwards.
- To create a new group, log in as a Site Administrator and go to . See "Adding / Editing a CMS Group" if you need details on adding a group.
- Populate the fields, adding a description so others can tell later what the group does.
- Select the Users and Groups you would like to add to the Group.
- Save your group.
- Once you create Users and Groups, log out of iAPPS as a Site Administrator and log back into iAPPS as a Content Administrator.
Assigning User and Group Permissions
Next you need to assign proper permissions to your Users and Groups. The sample below shows how to assign limited permissions to a specific section or sections of the site to a User or a Group, whether it be as an Author, Approver or Publisher.
- Go to .
- Select the Group you want and click Edit Permissions.
- Now assign users to the group. Below is a sample with Jayden Ward.
- Once you have added the User, you must add the specific Menu Permissions.
- Click Save and Add Permissions.
- Your site's menu structure appears in a popup.
- Check the box of the ‘Authors’ row for the ‘News’ section and its subsections. Then click Save.
You have just assigned this group's users to only be able to be an Author in the ‘News’ section of Menus & Pages. If you wanted them to author on more than one node, add additional permissions with the checkboxes or create them as a Global Author to give them permission for all menus and pages. In assign you can assign permissions for assts as well by using the tabs at the top of the workflows box titled Files, Images, and Content.
If individual users have more permissions than the group then they will be able to access all the group permissions and their own as well.
- Continue to set up permissions for each group for the designated section of the site.
- Create the Authors or Editors as “Authors”
- Create any Approvers, Legal reviewers and Managers as “Approvers”
- Create the Content Administrators or Site Masters as “Publishers”
For this example we make sure to check off the “Approver” boxes for all the relevant sections for the members of our Legal team, and to check off all the “Publisher” boxes for the members of our Site Masters team.
Creating the Workflow Process
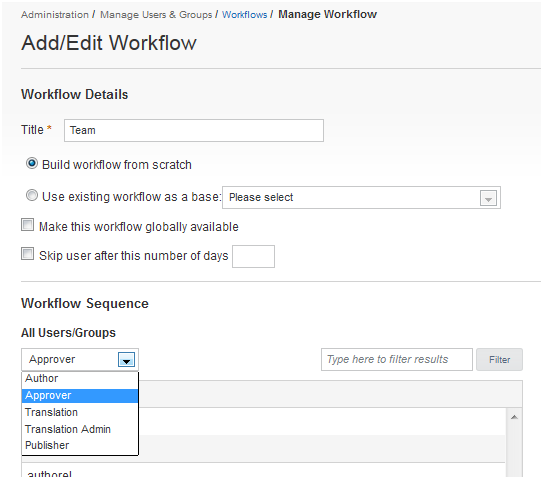
Once you have set up the proper Group and User permissions, you can create the workflows associated to each section.
- Navigate to
- For this example we will build the Workflow for the “Team” section and name it “Team Workflow”. This Workflow will look something like this:
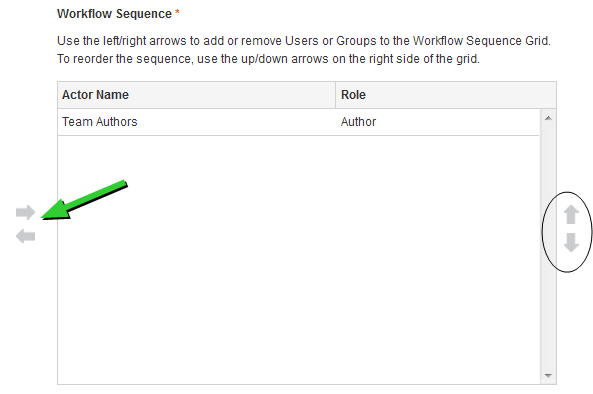
Notice it is built out with the Groups created rather than individual names.
- To build the flow, select “Build Workflow from Scratch”
- Next, select the groups for the Workflow. They can be found under the drop-down titled Author, Approver, and Publisher.
- Choose Authors, Highlight the name of the group, in this case “Team Authors.”
- Click the right-facing arrow and Team Authors will appear in the workflow sequence area on the right.
- Continue on to choose “Team Approvers” and “Legal” from the Approver view; and “Site Masters” from the Publisher view.
- You can also set up the workflow to skip users after a certain number of days. Once all users’ permissions are complete, name the workflow, and click Save.
Assigning Menu Items to Workflow
Once you’ve created the Workflow, you must assign it the Menu Item it applies to.
- To start, from the Workflows Screen () select Assign.
- The Assign Workflow container appears:
-
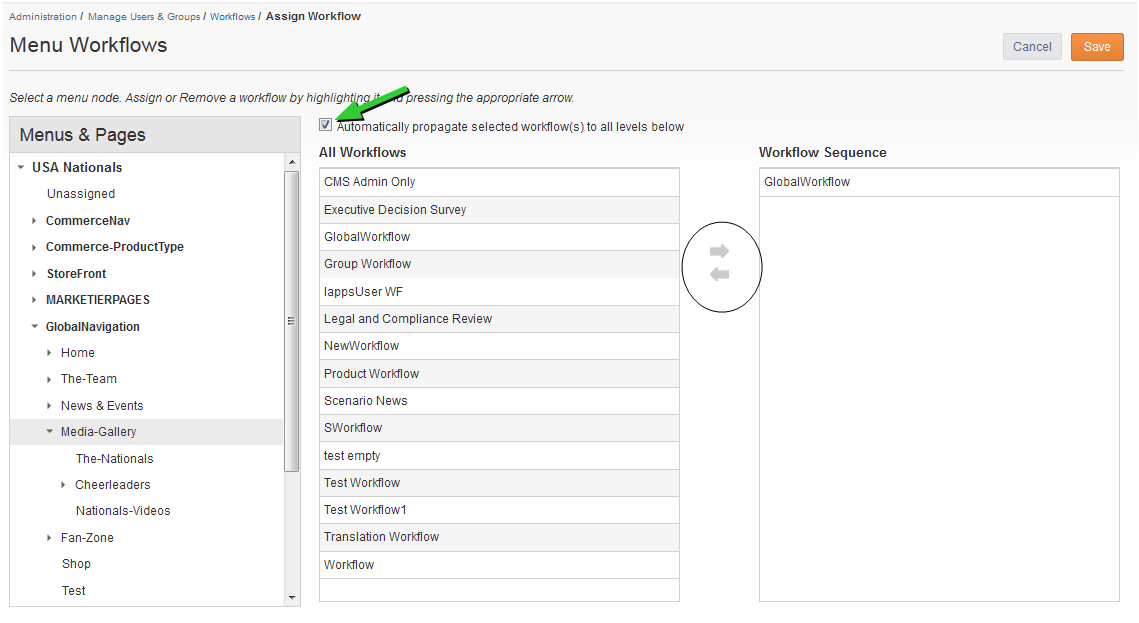
All workflow processes are limited to one site at a time. To add, edit and assign workflows in a multi-site or variant site menu, you must first switch sites using the drop-down option in the iAPPS header.
- Select a menu or menu and sub-menus to assign to a workflow from the Menu tree on the left (such as the Team).
- Highlight the desired workflow (such as Team Workflow) in the Available Workflows Column.
- Check the box next to "Automatically propagate selected workflow(s) to all levels below" as wished.
- Press the right-facing arrow to assign the workflow. It will appear in the Workflow Sequence Column.
- Click Save.
Congratulations! You have successfully added your Workflow to “The Team” menu item. From here, you can continue to add the workflow to all underlying menu items by highlighting the menu and clicking the arrow to send over the Workflow.
Testing your Workflow
Once you have finished setting up your workflow, you should set up some test pages or items to ensure it’s working properly.