This section contains step-by-step instructions on how to set up and manage workflows. Only administrators can set up workflows, although other roles can view and use them.
Workflows provide you with a review\approval process, so that an organization can control when new or edited content gets published to the site, and ensure the proper approvals are obtained before content appears on the website.
Workflows generally consist of assigning users or groups to review material in turn. Typical roles include Author(s), Approver(s) and Publisher(s). Workflows require that a user who serves in the capacity of a given role to take a necessary action before the campaign moves on to the next step in the workflow.
All workflow processes are limited to one site at a time. To add, edit and assign workflows in a multi-site or variant site, you must first switch sites using the drop-down options in the iAPPS header.
You can see a typical workflow example in this scenario.
In workflows, you can perform the following tasks:
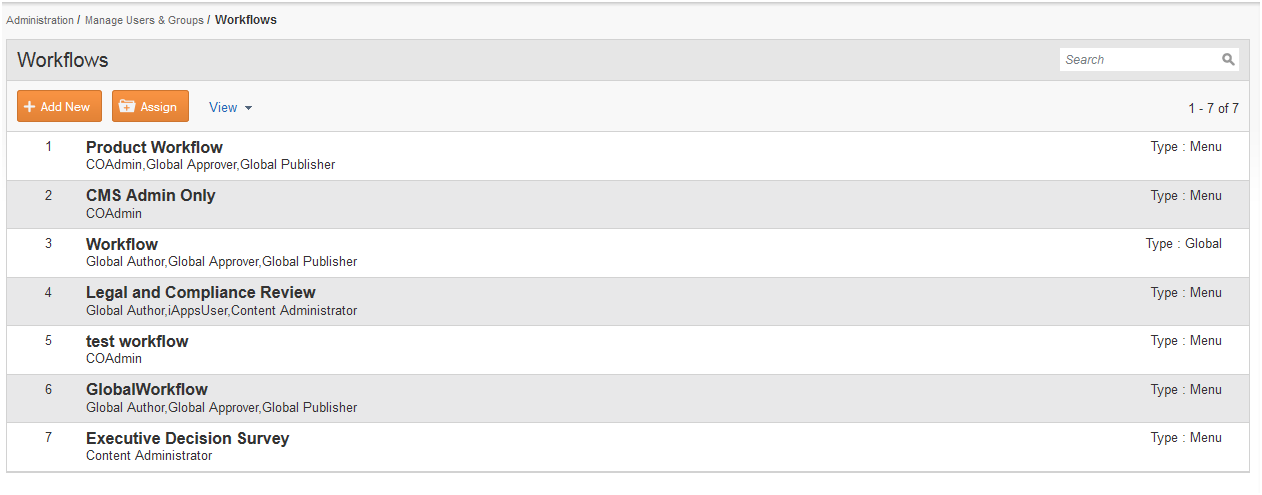
To manage workflows, select Administration > iAPPS Users and Groups > Workflows from the main navigation menu to display the Workflows screen.
It shows existing workflows, including a short overview of Users or Groups in the workflow and whether the workflow is global or menu/page based. You can filter the display to show only Global or menu-based workflows.
When you highlight a workflow, you will be able to View, Edit or Delete the chosen workflow, as well as view any pages currently in the workflow. (When you are in Site Editor, each page also displays the status of the Workflow. See "Page Workflow and Publishing" for more detail.
Also you will be able to Add New Workflows or Assign Workflows at any time by choosing one of those buttons.

You can create a new workflow from: scratch or use an existing workflow as a base.
It is a best practice to create a workflow using Groups and then assign individual users to the Groups. That way, if a user is out of the office or leaves, other users in the group can complete the workflow responsibilities. Also, you can easily add or delete individual users without remaking the entire workflow. Note: If a user is deleted or deactivated, make sure their workflow responsibilities are assigned to other users, especially if they are the only user in a group. See the iAPPS User Scenario Guide for more information.
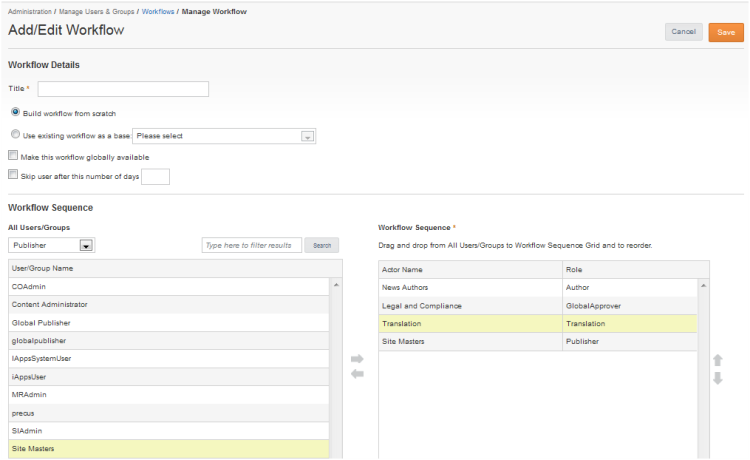
- To build from scratch follow the instructions below for building a workflow sequence.
- To use an existing workflow as a base, choose that radio button and then a workflow name from the drop-down menu, the options in the existing workflow will populate in the Details section and in the Sequence section. You can then edit the details.
Edit Options
Note: Once you have a created a workflow, it does not take effect until you have assigned it. See Assigning a Workflow to a Menu Item below.
To assign a workflow:
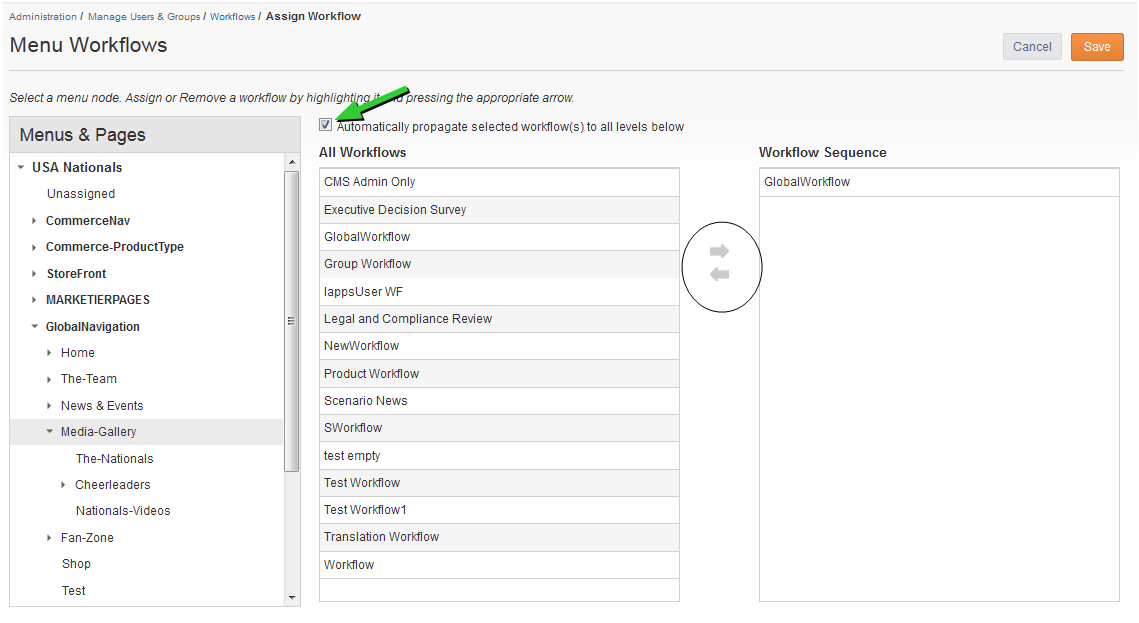
All workflow processes are limited to one site at a time. To add, edit and assign workflows in a multi-site or variant site menu, you must first switch sites using the drop-down option in the iAPPS header.
You can also Assign a Workflow directly on a Menu item, through the Edit Menu Properties interface. Simply click into the Workflow Tab on the right side of the screen to assign workflows. See "Viewing / Editing Menu Properties" for detail.
To delete a workflow, follow these steps:
From the Workflows Screen ( Administration > iAPPS Users and Groups > Workflows)
Highlight the workflow you want to modify and click Delete.
You will receive a popup confirming the successful deletion of the workflow and it will no longer appear in the Workflows listing.
You should always confirm there are no pages currently using the workflow before deleting it.
If you want to view whether any pages are using the workflow before you delete or edit a workflow, click View Pages in Workflow.
From the Workflows Screen ( Administration > iAPPS Users and Groups > Workflows)
Highlight the workflow you want to view and click View Pages in Workflow.
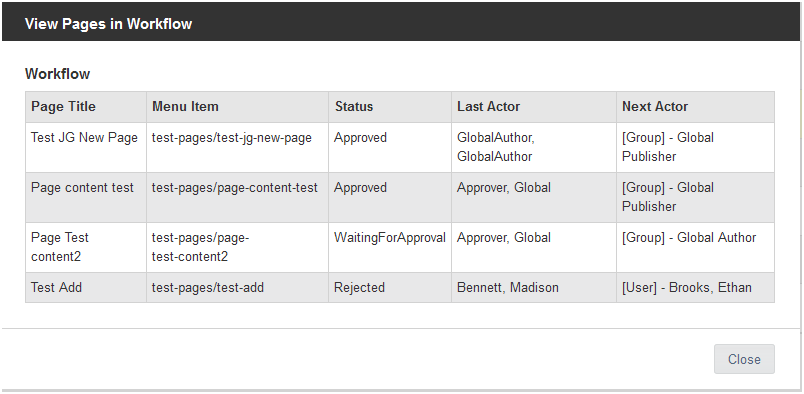
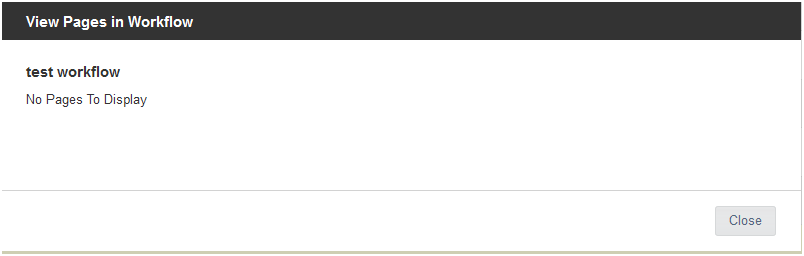
You will receive a popup listing any pages that use the workflow, or confirmation that no pages use it. Information includes the page name, its associated menu item, status and the most recent groups or users in the workflow process.
Click Close to return to the main Workflows listing.
|
iAPPS is a product of Bridgeline Digital
|
