
Warehouses and inventory are an essential part of the eCommerce process. Your installation may be set up to manually control inventory and warehousing, or it may take advantage of iAPPS Commerce’s GWS integration.
If you are managing inventory manually, there are many task administrators will need to oversee.
This section covers administrative tasks involved with
There are three types of warehouses
Digital products are simply housed on servers, but need to have a slight separate set up.
Synchronized or external warehouses simply mean that the inventory, restocking and likely fulfillment services are synchronized from your warehouse management system (typically UPS Global Warehouse System (GWS), but custom providers can be developed and used). This means that all information comes from warehouse synchronization messages, and you cannot manually adjust inventory amounts in the product catalog.
Manually managed or internal warehouses are managed by manually uploading restocking information or adjusting the inventory in the Product Catalog, both through the iAPPS Commerce Administrative User Interface.
When setting up warehouses, you should also choose a warehouse for returns. Generally the developer will have undertaken this task, but it can be changed through the Site Settings.
Returns warehouses receive any returned merchandise. You can only have one returns center at a time.
Ensure that the warehouse you want to designate is set up first as you can only choose a warehouse that has been set up already.
Go to Administration > Developer Configurations > General Site Settings.
For more detail on Warehouse tasks, see the iAPPS Commerce Developer Guide.
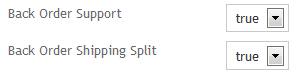
Before backorders can be used on the site, they must be enabled in the site settings.
In addition, any SKUs must have their Allow Backorder attribute checked off, before any backorder information will appear on the front end of the site.
The backorder site setting takes priority over any information in the SKU attributes, so even if an item has an “Allow Backorder” attribute, if the site setting for backorders is turned off, then backorders will not be allowed.
|
iAPPS is a product of Bridgeline Digital
|
